Thursday, January 30, 2014

Checking In

Hello, hello! I hope you all have been staying warm wherever you are. Snow is rarity on our little island and we did get just a little bit-- around half an inch, I'm guessing. The county closed our offices at noon on Tuesday {it was getting icy}, we were closed Wednesday, and I was told yesterday evening that we would be closed today, too. 

Clearly, we take snow very seriously here! 

I've been enjoying the time off from work. I've been curled up reading good books, eating way too much, catching up on laundry, and spending time with my love. The snow actually fell Wednesday morning and stopped around early afternoon. We took a walk on a nearby nature trail and explored the snowy scenery. It was beautiful!


Is it cold where you are? What are you doing to stay warm?

If you need to get that body of yours moving, check out the Fitnessista's Winter Shape Up workout. I've done it a few times this week and it's killer. I highly recommend it!


Wednesday, January 29, 2014

Homemade Vanilla Sugar

Good morning! It's Wednesday and the work week is nearly halfway over-- I'm excited for the weekend, as I'm going to {hopefully} get my Pilates certification on Sunday.

If you've been following me for a while, you might remember seeing my post on Homemade Vanilla Extract. And if you're new here, click the link and check it out! Making your own vanilla extract is so simple and it saves you $$$. 

And it makes the perfect hostess gift :)


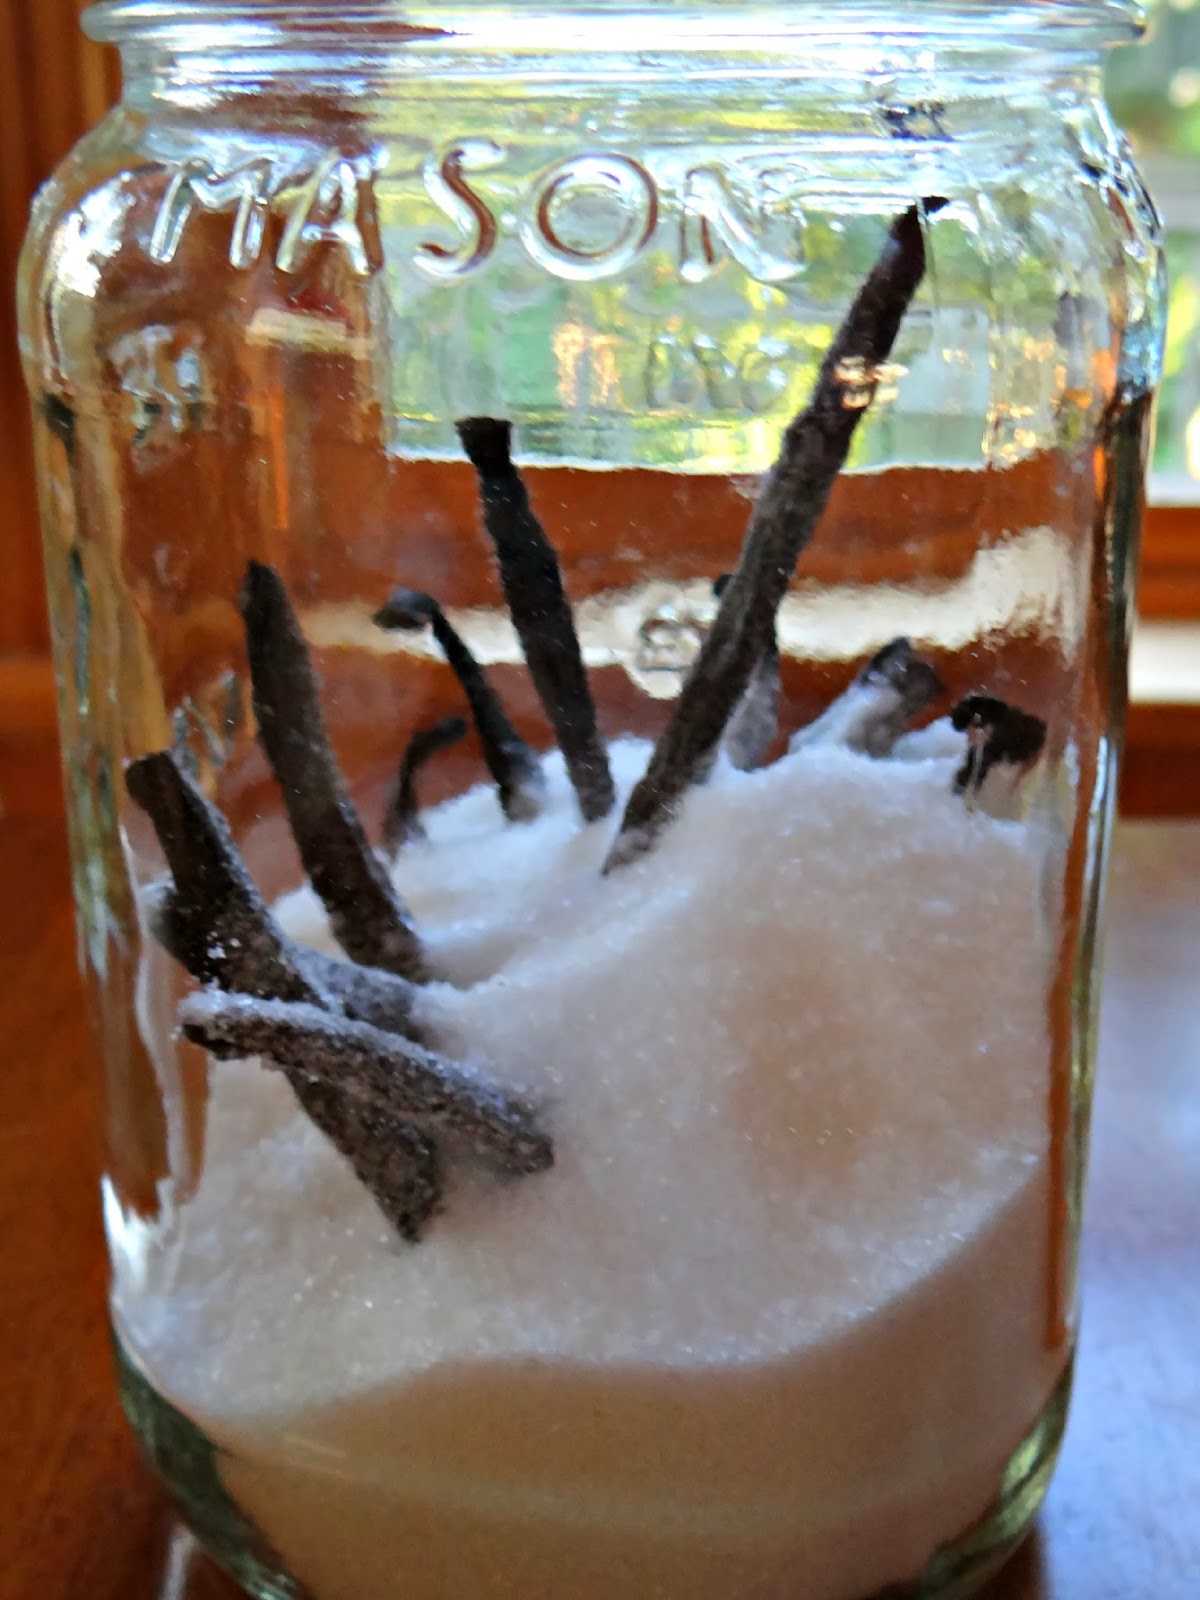
When the time came for me to bottle the vanilla, I didn't want to just throw away the beans. Instead, I placed them into a mason jar and filled the jar with sugar to make Vanilla Sugar. Vanilla and sugar are both great on their own, but are even better when combined. It's a great way to amp up your oatmeal, morning coffee or tea, and baked goods!


It all starts with vanilla beans! Mine are Madagascar beans. Don't have any used vanilla beans lying around? No worries! You can buy vanilla beans from just about anywhere-- the grocery store, Amazon, Beanilla, etc. 


Just get some beans and slice them down the middle and place them in a jar.


Fill the jar with sugar and if it clumps together, shake it every now and then.


Mmmmm... Vanilla Sugar! What are you going to make with yours?? 

Vanilla Sugar makes Chocolate Chip Cookies taste dreamy!


Monday, January 27, 2014

How to Knit a Coffee Cup Cozy {Step by Step}

It's Monday-- hope you all had an amazing weekend!

I've been seeing knitted coffee cup cozies for a a few years now, but they've really become popular over the last year. Today, I thought I'd share a tutorial so that you can learn how to knit your own. 


I'm no professional when it comes to knitting. I promise that if I can do this, so can you! I can knit scarves and more scarves and I only know how to straight knit (no purls here)-- that's about it! Knitting a coffee cup cozy is kind of like knitting a tiny scarf, but it's a ton less work. 

I used size 13 straight knitting needles and super bulky yarn for this project. However, you could easily use smaller needles and thinner yarn. 

Begin by knotting the yarn around one knitting needle. Let the "tale" hang off to the side.


You will now "cast on." Because my yarn is really thick, I'm only adding seven stitches. If your yarn is thinner, you will probably want to add more rows. To cast on, wrap the yarn over the front of the needle and around your index finger.


Loop the needle under the yarn and loosely pull the yarn over the needle, creating a stitch. 


Now you have two stitches. 


Continue the process until there are seven stitches total (including the initial knot).


Next, you will knit the first row. Just to warn you, the first row is the hardest! Just make sure that you don't pull the yarn too tight-- the tension matters! 

Hold the needle with the yarn in your left hand. With your right hand, begin to knit the first row. Insert the point of the right needle into the first stitch from front to back, under the left needle.


Take the loose yarn and wrap it in-between the two needles.


Now, draw the yarn through the stitch with the point of the right needle. Slip the first loop of the left needle off, so that the stitch is now on the right side.


Ta-da!


Repeat the process until all of the stitches on the left needle are on the right needle. Because the left needle is now empty, it becomes the right needle. 


Continue the process.


Continue knitting until you have reached your desired length. Remember, the yarn does stretch! Mine is about 8" long.


Now, we will "cast off." In other words, we will now get your coffee cup cozy off of the knitting needle! Begin by knitting two stitches. 


Once you have knitted two stitches, bring the first stitch over the second stitch (don't let the second stitch fall off) and let the first stitch drop. 


The second stitch is all that is left on the right knitting needle and it now becomes the first stitch. Continue by knitting another stitch and repeating the process...


Eventually, you will have two stitches left. Repeat the process one last time.


You are now left with one stitch attached to the needle. While carefully grasping the stitch, gently slide it off of the needle.


Don't let go!


Cut your knitting from the excess ball of yarn- leaving just enough yarn to secure a knot (or leave a few inches for sewing the cozy together- *see below). Thread the yarn through the loop and knot it.


Trim the excess yarn from both ends. Your coffee cup cozy is now ready to be stitched together! *If you left extra yarn at the end, use it to stitch the ends together. If you trimmed the ends, grab a piece of yarn and stitch it together. You could even sew a button to one end and a loop to the other end-- this way, you can use your coffee cup cozy on a mug that has a handle.


Let me know if you have any questions! If you make your own cozy, I want to hear how it turns out :)


Saturday, January 25, 2014

Baked Cheddar Zucchini Spears

It's the weekend!!! I'm so excited; it's been a busy week. Check out this pretty sunset from a few days ago...


Are you’re looking for a healthy and tasty dinner side dish that will leave you feeling satisfied? If so, look no further! These Baked Cheddar Zucchini Spears make the perfect side dish or snack. They come together in no time at all and they’re really delicious.


Makes 1-2 servings

Ingredients:

1 medium to large zucchini
Salt and pepper, to taste
2-3 tablespoons shredded cheddar cheese
Cooking spray or olive oil (I used cooking spray to cut down on calories and fat)

Directions:

Preheat the oven or toaster oven to 350*F. Line a baking sheet with aluminum foil for easy clean-up and spray it with nonstick cooking spray.

Wash and dry the zucchini. Cut the zucchini in half, and then cut each half into 6 or 7 spears.

Sprinkle the spears with salt and pepper to taste. Then, sprinkle the cheese over the spears.

Cook for 7-10 minutes, depending on how tender you like your veggies.

Eat and enjoy!


Any big plans for the weekend? I'm thinking that it's a head to a coffee shop with a good book kind of Saturday for me!


Thursday, January 23, 2014

Panfried Kale

Hello, hello! This week is flying by; I can hardly believe that it's Thursday. Today, in lieu of my regular workday, I'm heading to the closest YMCA {about 1.25 hours away} to observe some new fitness classes. I'm revamping our fitness schedule at work soon (we change it every three months) and I'm trying to get ideas for new classes that I can bring to our little community. In other words, we're trying to see how many fitness certifications I can get in one year! Just kidding :) 

Oh, and I finally got some answers about my foot. I tore my plantar fascia, but it seems to be healing well. I should be back to "normal" in 2-4 weeks, but was instructed to never teach so many fitness classes again. Sigh. I'm both relieved and disappointed by the news. It's good that I have to cut back- I know my body will be thankful, but I want to offer my center as much as I can and I don't want to disappoint people. 

Anyway... let's talk about kale.

I kind of have a love-hate relationship with kale. I love that is has so many vitamins. It's a super-food! But I'm not crazy about the taste. It's a bit bitter. And forget eating it plain and raw! At least give me some balsamic vinaigrette. 

But, when cooked, it's a different story. I actually kind of like it--- probably just because I know my body needs those nutrients! So, whether you have a love-love, a love-hate, or even a hate-hate relationship with the leafy unruly vegetable, you should give this side dish a try. This Panfried Kale will come together in a matter of minutes and will taste great paired with your next dinner. 

P.S.-  I was pleasantly surprised with how well this photo came out! Oh, and this kale, with a drizzle of lemon juice, pairs beautifully with steamed shrimp. Trust me, I know :)


Panfried Kale
Recipe by Pioneer Woman

Ingredients:

1 large bunch of kale, or 2 regular bunches
1-2 tablespoons olive oil
5 cloves garlic, finely minced
Salt and pepper, to taste

Directions:

Thoroughly rinse the kale in cold water and tear it into chunks. In a large pan over medium-high heat, heat the olive oil. Add the garlic and quickly stir it around to avoid burning. Add the kale to the pan and use tongs to toss it while it cooks. Add the salt and pepper and continue cooking for 1-2 more minutes, until it has wilted, but still crisp.


How would you describe your relationship with kale?
:-)


Tuesday, January 21, 2014

Vinegar Green Beans

I hope you are all having a great week so far. I'm finally going to see an Ortho for my foot today. While my foot is feeling much better, it had been hurting since the beginning of December, so it's definitely time to see a specialist so that I can make sure there aren't any bigger issues. And since a visit to the specialist means leaving the island and a 1.5 hour drive, I went ahead and made an eye doctor appointment for this morning too. Taking care of business!

Before I hit the road, I have a super simple recipe to share with you. Make this side dish to go with your dinner tonight; you won't regret it!

--

The funniest thing happened right before Christmas. My mom, Chuck, and I were sitting around her kitchen table discussing what the Christmas dinner menu would look like. We decided on a turkey breast and a ham and then we started to talk about what sides to serve with it. 

Chuck volunteers to make his Vinegar Green Beans. His vinegar green beans... like it's a thing. He swore up and down about how great they were and said he needed to dig out the recipe. He was so excited as he told me what they tasted like and he could hardly believe that I had no idea as to what he was talking about. We've been together for nearly five years and I have never tasted these world famous green beans. It was clearly before my time...

Well, the boyfriend who doesn't do much cooking needs to start cooking a bit more often, because these were some good green beans! It's a great way to dress up a can of plain ol' green beans.

Sorry for the sad photo...


Chuck's Vinegar Green Beans come together with more of a method than a recipe.

Here's how to make them:

Empty a pound of drained canned green beans into a medium-sized pan over medium heat. Add up to 1/8 cup of white wine vinegar and up to 1 tablespoon of sugar to the pan. If desired, add in dried chopped onions or freshly sauteed onions and several slices of bacon (cooked and chopped). Stir well to evenly coat green beans and cook until heated through.


How do you "dress up" canned vegetables?


Sunday, January 19, 2014

Easy Cheese Danish

Good Morning and Happy Sunday! Hopefully many of you get to have an extra long weekend :) And if not, you can still make your weekend a little extra special with the recipe I'm about to share with you.

Each month at work, I host a knitting group {yes, I get paid to knit and yes, it is awesome}. We meet twice each month and I always try to bake something to bring and share with the ladies. This month, I was a bit pressed for time and was looking for a super easy recipe that also tastes great. When I came across a recipe for a very simple mini cheese danish, I knew exactly what I would be baking! Though I chose not to add a glaze atop my danish, I included a very simple recipe for one-- just in case some of you want to take this recipe up a notch! 

This cheese danish would taste great paired along with a cup of coffee as an afternoon pick-me-up. Just saying...

Easy Cheese Danish
Recipe adapted from Lemon-sugar.com

Ingredients

1 can refrigerated crescent rolls
4 ounces cream cheese, softened
1/4 cup sugar
1/2 teaspoon vanilla extract
2 teaspoons lemon juice

For Optional Glaze:
1/2 cup confectioners' sugar
1 Tablespoon milk
1/2 teaspoon vanilla extract

Directions

Preheat oven to 350 degrees F and prepare a large cookie sheet with parchment paper or a Silpat mat.

Carefully remove the packaging from the crescent rolls, but don’t unroll the dough! Instead, slice the log into 12 slices and place the slices on the cookie sheet.


Use your fingers to press an indention into the dough. This is where the filling will go.


To make the filling, combine the cream cheese, sugar, vanilla, and lemon juice with a hand mixer until smooth. Spoon 1-2 teaspoons of filling into each danish. 


Bake for 12-15 minutes or until golden brown.

Optional Glaze: While the crescents are cooling, whisk together the confectioners’ sugar, milk and vanilla and pour over the tops of each danish. (If you want the glaze to be thicker, add more sugar. If you want a thinner glaze, add more milk.)


What are you up to this weekend? Hope you all have a fabulous Sunday!


Friday, January 17, 2014

Quick Ab Burner

Thank goodness it's Friday! Before we get the weekend started, I thought I'd pop in with a quick Ab Burner for you guys. These are really basic exercises that don't require any equipment and they don't bother injured feet (the foot is still hurting)! Hooray!

Repeat the set up to three times throughout your day for optimal ab burn :)


Along with my regular work schedule today, I'm going to sit in on a Pilates class at a local YMCA to see if it's something I might want to learn to teach. I'm excited!


Any Pilates lovers out there? If so, what do you like about Pilates?


Wednesday, January 15, 2014

Chocolate Whoopie Pies with Creme Filling

Sugary sweets are definitely my weakness. I have a huge sweet tooth and hardly any self control. Oh yeah, and we just started a 6-week weight loss challenge at work. Ahem.

So, since I'm not allowed to indulge in these treats for the sake of my team, I'm going to share a recipe with you-- a recipe for Chocolate Whoopie Pies with Creme Filling. In case you didn't know, whoopie pies are basically little cakes that are sandwiched with some sort of filling. They're adorable.


I made these a while back when I got my Whoopie Pie Pan, which is one of my favorite baking pans. They are so cute and fun and totally delicious! You can use a boxed cake mix if you're short on time, but this recipe is so simple and tastes much better.

Recipe from Wilton

Ingredients:

1/2 cup (1 stick) butter, softened
1 cup firmly packed brown sugar
1 egg
1 teaspoon pure vanilla extract
2 cups all-purpose flour
1/3 cup cocoa powder
1 teaspoon baking powder
1 teaspoon baking soda
1/2 teaspoon salt

1 cup buttermilk

Directions:

Preheat oven to 350°F. Lightly spray Whoopie Pie Pan with nonstick cooking spray.

In large bowl, beat butter and sugar with electric mixer on medium speed until light and fluffy, about 3 minutes. Add egg and vanilla; beat until well combined.

In another bowl, sift together the flour, cocoa powder, baking powder, baking soda and salt. Add half the dry ingredients into the butter mixture and mix on low speed. When dry ingredients are almost incorporated, stop the mixer and add the buttermilk. Continue to mix on low speed until all ingredients are almost incorporated. Stop the mixer and add the remaining dry ingredients. Mix on low until just combined. Spoon 2 tablespoons of batter into each cavity; spread batter to the edges. Cavity should be about 2/3 full.

Bake for 8-10 minutes or until the top of the cake springs back when touched. Allow cakes to cool in pan 8 minutes. Remove from pan and cool completely before filling. To assemble pies spread filling on one cake and sandwich with another cake.


For the filling,

Ingredients:

6 tablespoons butter, softened
1 1/2 cups confectioners' sugar, sifted
1/8 teaspoon salt
1 jar (about 7 ounces) marshmallow creme
1 teaspoon pure vanilla extract 

Directions:

In large bowl, beat butter with electric mixer until creamy. Add sugar and salt to the butter; mix well. Add marshmallow crème and vanilla; blend well.


Monday, January 13, 2014

Mini Spinach and Mushroom Frittatas

Hope you all had a fabulous weekend! I've been fairly busy over the last week, but I'm back again to share a super easy breakfast/brunch recipe with you.

I may just be a complete weirdo, but does anyone else out there despise pie crust? I really don't care for it, whether it's in a sweet apple pie, a savory chicken pot pie, or in a quiche. I just don't like it. And I look at my pie crust disgust as a good thing- skipping out on the pie crust cuts calories and fat. Win.

Frittatas are the crustless quiche. They rock my world. Oh, and did I mention that they're a great portable breakfast option?

The possibilities are endless here. Just toss together your favorite breakfast ingredients and you have a winner! 


Mini Spinach and Mushroom Frittatas
(Makes 12)

Ingredients:

1 large white or yellow onion
1 cup fresh mushrooms, diced
1 cup fresh spinach, trimmed and chopped
8 whole eggs
1/2 cup soy milk (any milk will work)
2 heaping tablespoons cheese (or nutritional yeast)
3/4 teaspoon sea salt

Directions:

Preheat the oven to 375 degrees. In a large skillet or pan over medium heat, cook the onions and mushrooms until they begin to brown (either use cooking spray or a drizzle of olive oil so the veggies don’t stick). 


 Once the veggies are browned, add the spinach and continue to cook until it begins to wilt.


In a separate dish, whisk together the eggs, milk, and salt. Make sure the eggs are thoroughly beaten. Add the cheese and mix well.

Grease the muffin pan with cooking spray and pour the egg mixture into the muffin cavities. Fill to about 3/4 full – to avoid overflowing.

Bake for about 20 minutes or until the egg is set and the tops begin to brown. Tip: they are done when the frittatas don’t jiggle when you shake the pan.


Let the frittatas cool in the pan for a few minutes. Use a butter knife to loosen the frittatas from the pan. Serve immediately or let cool completely and refrigerate or freeze. 


Recipe adapted from The Daily Garnish.

Thursday, January 9, 2014

The Office Workout

Has everyone had a good week so far? It's almost Friday :)

It's been a good week so far. I had to pick up a shift at work on Saturday, so I was lucky to have Tuesday off. Babe and I were lucky to have a chance to spend the day together. It's tough when you don't have the same days off as your significant other. Anyway... we went to one of our new favorite coffee shops in the northern part of the Outer Banks and I saw a magnet for sale that really spoke to me (apologies for the blurry phone pic).


On another note, it's been too long since I've posted a workout on here!

This one is actually inspired by the limited-mobility older adult students that I work with. They're such troopers and even though they have difficulty getting around, they still show up and give it their all!

This quick workout can be done during breaks while at the office-- while seated in your chair! I know that you all have a few free moments in your workday (I know I have a few) so in the spirit of the new year, take advantage of these moments and get in some strength training. You will return to work feeling energized and ready to tackle that to-do list!

For this quick workout, all you need is a pair of dumbbells.


I haven't really talked bout it on the blog, but I've been having to keep exercise really low key lately (for weeks actually), as I've injured my foot. The doc instructed me to stay off of it, as it could take 2-6 weeks to heal. I've been going crazy not being able to do the intense cardio that I love, but thankfully, I've been able to do a few exercises that don't bother my foot. I never quite realized how important exercise is for my mental health-- until now, when I can't exercise!


Do you physically need to exercise?

Exercise really seems to lift my spirits, helps me sleep better, and makes me feel great about myself. Toning the booty never hurt, either ;)


Tuesday, January 7, 2014

My One Day Juice Cleanse

My parents gave me a juicer for Christmas-- it's the Breville Juice Fountain Plus. They had asked me what I wanted for Christmas about a million times, and I couldn't come up with anything. Not one thing. I thought long and hard about it, and I finally decided on a juicer. I've been reading a lot of great things about juicing and what it can do for your body, so I figured I'd give it a try.

You would think that I would first test the whole juicing experience with a single juice--- nope! I decided that I would do a 3-day juice cleanse the weekend after Christmas. Babe, bless his heart, willingly decided to do it with me, so off to the grocery store I went. I chose juice recipes by Vegan Cooking, for no particular reason other than the fact that she provided a shopping list for everything involved.

I had initially bought enough ingredients for the 3-day juice cleanse for one person. We wanted to make sure that the juices were fresh when we drank them and to be honest, we weren't so sure about what we were getting into. I came back from the grocery store with this:


I'm not sure if Vegan Cooking's grocery store has different size "bunches" of produce than mine did, but holy kale! I had enough to feed an army... Most of her juice recipes ended up making four juices, adding little to no water to them. So, if you're planning to try out her cleanse, there's way more produce on that list than what's necessary! Anyhow, Babe and I decided that we would change our 3-day cleanse to a 2-day cleanse since it made so much juice.

The juicing process went really well. The juicer worked great! It took about 2.5 hours with produce prep, juicing, and clean-up. We had a good bit of pulp for our compost, but I was still impressed at how much juice we were left with. We ended up with 25 jars of juice!


And so it began...

You guys! I hated this juice cleanse! I'm hypoglycemic, meaning that my blood sugar gets low. I need to eat something every couple hours to prevent my blood sugar from dropping and to prevent myself from dropping to the floor. Being hypoglycemic is not fun or convenient-- it's just the way that it is and now, I have even more respect for it. So, if you haven't guessed already, I had major issues with the juice cleanse.

The morning started off fine. I'm typically an "eat within 20 minutes of waking up" kind of girl, but surprisingly, I was fine. I had my first juice and about an hour an a half later, I had my second juice. Yes, I wanted food, but I was fine.

Juice 1: Kale, Spinach, Romaine, Cucumbers, Celery, Apples, and Parsley

Juice 2: Apple, Pineapple, Mint, and Lemon

By the time juice number three came along, I was feeling quite nauseous. I had a pretty bad headache by the time this juice was finished.

Juice 3: Kale, Spinach, Green Grapes, Celery, Pear, and Cucumber

By the time juice number four was to be consumed, I was really shaky and feeling totally terrible. And I wished I had added the optional agave.

Juice 4: Ginger, Apple, Limes

I couldn't bring myself to try juice 5. Babe tasted it first and said it was fine. Then he changed his mind--saying that it tasted more like dirt- those darn beets!

Juice 5: Beet, Broccoli, Kale, Celery, Apple, Parsley

Instead, I skipped right to juice 6. It was certainly the most filling of the juices and it had the most mild flavor as well.

Juice 6: Almonds, Dates, Vanilla, Cinnamon, and Nutmeg


Results

My cleanse was really too short to see any real results. Though I could not have made it the whole three days, Chuck definitely could have. I didn't experience any sense of calm or clearheaded-ness--- I had never felt worse.

I would love to be a person that does juice cleanses and feels great afterwards. But I'd also love to be a person that enjoys taking baths, and I don't see that happening either. So, for me and my health, I'm going to stick to the occasional juice and forget the juice cleanses.Instead, I'll try to focus on eating more of those foods that would otherwise be juiced and eating less of the processed stuff.


Have you tried a juice cleanse? If so, how did it work for you? 

I read that a lot of people see results like clear, glowing skin, weight loss, a more clear mind, etc.


Sunday, January 5, 2014

Sweet Potato, Spinach, and Turkey Sausage Hash

Happy Sunday, everyone! I hope you are having a great weekend, spending time with friends and family and getting to recharge <3


My local grocery store had sweet potatoes for $0.25/ pound a few weeks ago. I guess they ordered too many for the holidays and had a ton that they were trying to get rid of. Either way, I was thrilled and bought several. This girl loves a deal :)


I wasn't sure what I would make with them, but I remembered seeing some sort of sweet potato skillet recipe on one the blogs I frequent, Carrots 'N' Cake. I didn't have my phone or computer nearby, so I sort of threw together what I had on hand. The end result was Sweet Potato, Spinach and Turkey Sausage Hash. I actually really enjoyed this meal and I'll definitely be adding it to the rotation! I love it when I'm able to find healthy dinners that taste great!


Sweet Potato, Spinach, and Turkey Sausage Hash


Ingredients:

1 tablespoon olive oil
1 huge sweet potato, peeled and diced
1 small onion
1/4 cup broth or water
2 links of Italian turkey sausage, chopped into small pieces
3 cups fresh spinach
Salt and pepper to taste


Directions:

Heat the olive oil in a large skillet over medium heat. Add the sweet potatoes, onions, and broth (or water) and cook until tender.

In a separate skillet, cook the turkey sausage  until it is browned and no longer pink on the inside.

Add the turkey sausage and spinach to the sweet potato mixture and cook on medium-low until the spinach wilts. Season with salt and pepper as desired.


What are your favorite dishes to make with sweet potatoes?

I'm a huge fan of slicing sweet potatoes thin, sprinkling them with olive oil and cinnamon, and baking for an alternative to French fries.